Thursday, December 8, 2011

Finishing Up With the Visualized Time Line (0.4)

After re-reading my last release, I just wasn't going to be happy unless I finished off my pet project I undertook for the course.

In order to finish up, I not only had to finish all the features I wanted to implement but also make the code readable and understandable enough so that when the next person comes along and wants to make an edit, they will be able to.

Since I built this on the canvas it's basically just a lot of math and scaling the elements according to the size of the canvas the user wants to give the visualized time bar.

For testing purposes, 20 height by 220 width seems to be the sweet spot. You can definitely make it bigger than that but any smaller and things start to get to small/run out of room etc.

Anyways, I took all my calculations and labelled them accordingly and cleaned up any redundant or obscure calculations (as best as I could).

So last time I wanted to implement current duration, sound, and request animation frame. Sadly to say after countless hours of hacking away at request animation frame I just gave up. That's the last little bit that the next person who decides to look at my code should probably check out. Hijacking the browser's js with a setInteval isn't probably the cleanest way of implementing the plugin.

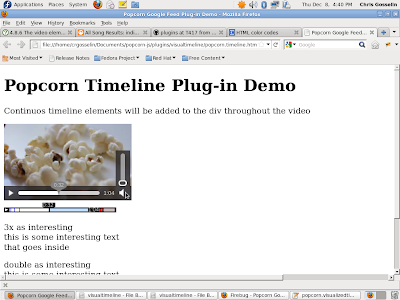
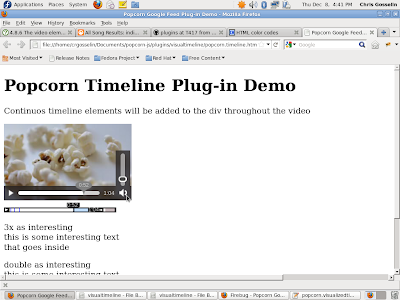
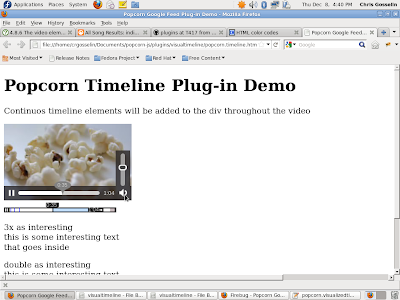
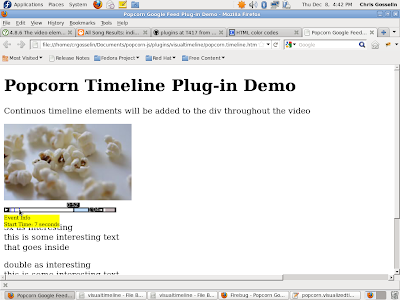
But, I did add in the mute and change volume functionality based on the design on the already existing timeline on the demo video.

I played around with the color scheme to make it similar to the normal timeline of the demo video but that can always be switched around easily by just changing the hex codes; as I said before, the code is now readable so it's simple to find out where to place the color you want.

Taking into consideration all the requests on the bug post, the next step should incorporate visualizing chapters as well.

Aside from all this, the canvas may very well not be the best way to display all the info and functionality. Since I wanted to finish up what I started, I got Noah from my Open Source class to take on hacking away at the dom elements to see what he could get accomplished. Assuming he figures it out, we would just have to incorporate my logic into his new design; should be fairly simple.

I'm going to post some mockups, link to my code, and ask for a pull right after this blog post.

It was a pleasure trying to give something back to the online community and I hope I have more time in the future to do so.

Cheers,

Chris

Monday, November 21, 2011

Visualized time line coming together

From my last push to the visualized time line, I've implemented all the missing features and more.

I've faced a few more problems advancing it which include:

Using request animation frame to properly request a frame from the popcorn object instead of highjacking the the frame rate in a setInterval function.

Figure out what the best way to change audio aesthetically would be.

Should I still add the duration length at the end?


Aside from all that, I'm pretty happy with the progress from the last time. Aesthetically, it looks a hundred times better. Functionally, it's working quicker since I changed the way I did a few methods and drew out the time line.

Something I've noticed with canvas is that every draw call counts. Especially when it comes to text. This is a major problem I've realized other developers are facing especially (using in a larger scale of text but a timeline must be very quick).

Anyways, I've added:
1. Current time above the current time cursor
2. Pause/Play Button
3. Fixed the mouse over bug over the events
4. Modified the base timeline to allow for other options and easier changes in the future
5. Picked out an aesthetically pleasing color layout and timeline layout
6. Modified a lot of the code to increase frame rate

To still do:
1. Figure out what I'm going to do with the audio portion
2. Do I put in a duration length?
3. Figure out how to implement request animation frame

Few screen shots below for anyone interested:

Wednesday, November 9, 2011

Debug Build of Mozilla

Well after an hour of installing missing packages and redirecting my autoconf to an older version, it finally decided to make the build.

Looks like it might take awhile, so I'm just going to leave my computer on over night and check it in the morning.

If anyone has any issues building the debug build of firefox on fedora just:

Create a .mozconfig file in the root of the mozilla branch.

download autoconf-2.13, extract it, and point the AUTOCONF variable to the extracted folder's exe in .mozonfig.

Next, add the debug option to ac_add_options to .mozconfig.

Everything else is just finding the right packages and installing them.

Cheers

(Just as a little proof for class, here's it compiling)

Wednesday, October 26, 2011

Visual time Line Additions

-Added in a div when hovering over track event points on the time line.
-Added allowing users to click on the time line to change the current time of the media

To do:
-Add pause/play
-Add current time : duration text
-Make it look more presentable (round rectangles, better colors, etc.)

First draft on canvas

I've been fiddling around with a bunch of different concepts and ideas but this my first simple prototype.

User creates a canvas and passes the plugin the canvas name along with wanted width, height, and the same media id as popcorn is passed.

The plugin then sets itself to be run at time zero, grabs a reference to the popcorn object calling it, sets up the canvas, and sets a listener on the media element.

When the media element is done loading, it stores a reference to the media element's video duration and current time.

An interval function is set with the draw function.

The draw function calls and stores the return value getTrackEvents using the stored popcorn instance that called the plugin, draws out the appropriate timeline box, draws the cursor in the right spot using the stored duration and currentTime variables, and then draws out the spots where events are going to be called by the popcorn instance.

Pretty simplistic so far but I'm going to add more features in the next few days such as:
When mouseover the canvas check the positioning of the mouse and check that versus the X coordinates of the showing events. Create a floating div over top showing some information like literal start time, literal end time, and a description if available.

Clicking on the timeline can change the currentTime of the media element so that you can use the visualized timeline bar as a normal timeline bar. Pause/Play could be implemented as well.

Going to clean it up and make it look a bit nicer playing with some of the canvas draw functions.

Could have the the current time drawn as text.

Research some better ways rather than drawing X frames per second.


*Below are just two screen shots showing the simplistic visualized timeline so far*


Tuesday, October 25, 2011

DIV vs Canvas for visualized timeline

I was thinking about the advantages of the DIV vs canvas to create my visualized timeline last night and came up with an interesting point.

As discussed in my last post, I'm going to have to remove the current time cursor and add it back onto the base layer. Unless I use dynamic divs.

If I use styled divs I can set the current position cursor's div to the constantly changing current time of the media element. This would take a lot of the effort off my own code and change the div's relative position dynamically.

The steps in order to do so would be as followed:
1. Create an encapsulating div.
2. Create the wide base time line bar div.
3. Overlay the cursor div inheriting using the same Y position as the base and use it's X position as the current time variable within the media element. I can just use the duration variable in the media element to calculate the proper spot for the div in a calculation.
4. Lastly, just overlay the divs for the track event visuals with mouse over events at relative start time position for those events.

What I'll still need is:
Popcorn's media element's id to track it down on the page and get it's information.
A listener for the track events that will get their info.

The process order would be:
Create all the variables
Load all the variables on popcorn's media element
Create the event divs on addtrackevent call with mouseover event

This seems to be an a quicker and easier way to keep track of all the visuals needed to create the timeline.

Monday, October 24, 2011

Thinking out the visualized timeline

As of late, I've been diving into some of the popcorn.js to see what the best of way working out the visualized timeline would be.

I've come up with an idea of how it should work.


-Create variables to hold array of event tracks, and number of event tracks. Put number of event tracks into a safe state (0)


-When popcorn gets its media element, load the timeline data object with references to the media element (current and time), as well as a reference to the event tracks array and number of event tracks


-Draw a base for the visualized timeline that will have a current time cursor layer and event tracks layer on top


-When the current time changes, clear the layer containing the current time cursor, and add it back on at the appropriate spot.
(I'm a little worried this might be slow as every time the time changing, a removal and creation must happen)


-Whenever addTrackEvent is called, add that track into the track events array existing in the plugin, and add that track event onto the visualized timeline in the track event layer.
(This allows the plugin to keep track of track events that are created on the fly)


-A good idea would be to create a mouseover event to display a popup div with relevant data about a track event

Object for holding timeline data:
{
current: (current time in video - references video element's currentTime property)
time: (full video time - references video element's duration property)
tracks: (array holding event track objects - references a static array in the visualized timeline plugin)
nTracks: (number of tracks - references a static variables holdings number of even tracks in visualized timeline plugin)
}


So I have to figure out:
-How to get the media object upon popcorn instance creation
-How to have my plugin be notified upon track event creation/grab that track event to hold onto

I was a little worried about firing events at variable changes but I found a nice stackoverflow article showing how to create an object.watch method for the object prototype: http://stackoverflow.com/questions/1759987/detect-variable-change-in-javascript

The next few days should be interesting indeed.

Sunday, October 16, 2011

Visual Timeline Possibilities

My teacher for Open Source made a good point about implementing this. It is extremely broad and a lot of things are to be taken into consideration.

Plugin vs. Direct Integration. Direct integration would be easier but how much would it bloat the core?

Canvas vs. Div. Plugins for now are all just using their own div, but using a canvas instead would be interesting. A canvas would allow for more graphical capabilities.

*OR* If possible edit the html5 video element's timeline directly.

Once I've further discussed this with other members of the popcorn team, there's one thing for now that may cause some problems. Popcorn is able to create a new event from a previous event. So when drawing out the visual timeline with all the events, some of them might not exist yet. However I end up doing the new timeline, it has to listen to event creations to re-update the timeline.

A trip to CDOT seems to be in store sometime tomorrow to talk with the popcorn team.

Popcorn visualized timeline

Decided I needed a change of pace and after roaming around the other open source projects, I came across a cool ticket for Popcorn. It's to create a plugin for popcorn that allows for a nice way to visualize the popcorn timeline. In short, it should show a timeline bar with all the points where other popcorn objects are going to be shown. I'm thinking about also adding in a mouse-over event to show a quick description for what the event is.

Thursday, September 29, 2011

Finishing Up With 0.1

To all those embarking on the journey of adding to open source projects, be warned, there is a steep learning curve.

I have faced adversity in many forms leading up to committing my first ticket fix branch. Some of which included finding an appropriate bug to start on, installing a linux partition on an HP laptop, installing all the necessary software to build the project and tests, finding out that just because you fork the main repository that it doesn't mean it will be bug free (see missing test suite), and submitting the issue fixes to your repo properly.

All of which I have discussed except the last one. I mistakenly made my changes on the original development branch, commited, and pushed that to my repo. Along with a merge error of some sort involving a folder, it turns out you create a separate branch to put your changes on so as not to disturb the current development branch. Once your fix gets put into the main development branch and double checked, that's when your changes get put it.

Anyways aside from that, it's been an interesting experience. Hours upon fours of IRC chats discussing issues, finding out opinions of the best way to go about things, and learning about other projects being used by their actual creators. It's awesome that the community helps each other out so willfully, otherwise I would have my doubts in open source software succeeding. As I learn, I too will field any questions that I have the capability to answer; almost like a knowledge karma situation.

Regarding the actual issue, it was more of a suggested change to Gladius than an actual issue. That's what I'm being told Gladius is doing mostly right now anyways; repositioning and restrategizing on what direction the team wants to take it. I am proud to say I have been apart of this process even though I feel my task was seemingly insignificant. I guess the more you participate, the more you learn and the more you can contribute; just takes time.

I feel like I've already learned quite a bit and hope to continue to do so. As soon as the fix for the test suite is put up I plan on testing my fix and making sure I didn't break anything, but for now I can start my second task. I feel like this time I'll have a better handle and be able to commit to a much larger issue.

Cheers and Happy Hacking,

crgosselin

Wednesday, September 28, 2011

Of Course the Test Suite is Broken

So my code compiles, awesome.

Now I need to find out if I broke anything that uses math.js so I can switch it to engine.math.function from math.function.

I get node.js working, I compile all the data, and of course... the test suite is broken.

I've been working with JSilver999 (another classmate) on fixing the test suite. He made a fix on his computer but trying to replicate it without just updating from git has been a pain.

It'd be nice to get the test suite running tonight so I can check my code before I commit anything to my repo... it's midnight so I might just go to sleep since I have an 8:00am class.

Testing Road Block

So I changed all the code around to what I think it should be and I went to test it but of course I'm missing node.js.

After getting node.js to build the gladius tests etc., node.js tells me I don't have a proper cxx compiler.

Digging around I find a nice stackoverflow page that shows me I have to:

yum groupinstall "Development Tools"

yum install openssl-devel

To install all the proper compilers etc.

Now I can install node.js so I can 'make' gladius and check the tests to see what I broke.

Fedora should really come with some of this stuff standard.

Changing way Math.Js is loaded

Finally got to ack again to clarify some of the questions I had.

It's come down to defining math.js to be required instead of keeping it as a variable. This way the actual engine will encapsulate math and be used throughout the engine more efficiently. Gladius-src.js is in charge of saying what is and isn't required. So I have to remove the basic script tag add for math.js in gladius.js and make it required within gladius-src.js. This is going to cause some errors since the calls to math.js are currently just using math.FUNCTION due to the way it is currently declared. I'll just have to use the test functions to see where the errors occur and switch it to engine.math.FUNCTION.

Seems easy enough but that's usually how it starts. I'll write another blog post once I run into more problems or hopefully switch it over on my first try.

Breaking Down Math.js

After receiving my task from ack and trying to start working on it, I came to the realization I needed to ask for some more help understanding how Require.js works and how Gladius gets built.

I logged onto IRC and had a nice long chat with jrburke who is the creator of Require.js.

He was able to help field some of the questions I had about how to go about implementing math.js is a way to make it require-able as well as build-able.

Now I understand that Require.JS has the capability to combine modules based on a set path.

Time to do some further digging into gladius.js, gladius-src.js, and Gladius' make file as ack suggested earlier.

Tuesday, September 27, 2011

Back to Gladius

After sticking around in the IRC channel for Gladius for awhile, I found the perfect issue and was assigned it by ack.

My job is to integrate the math library stuff into gladius. So working on Gladius.math and getting it to build using Require is my primary goal for the moment.

Second Thoughts On Emscripten

After looking at a lot of the emscripten code, there is nothing that really stands out to me that would need changing to make the code more readable. Function names, variable names, and aesthetically it seems fine. There are 2 days left until I have to have something for my 0.1 release. Tonight will be spent on IRC looking for something to do. Hopefully I can come up with something presentable in the next 48 hours.

Install Fedora On Laptop

I realized if I want to work on emscripten at home I had to install a linux partition on my laptop. After starting at 2:00pm I finally finished at 6:00pm. Here is what happened during my 4 hour labor.

I started by buying a re-writable DVD and burning Fedora onto it at the open source lab. This alone took 40 minutes. Next I booted from the CD and couldn't figure out which option to select. After toying around with it, I figured out I had to select to install a new partition from simple video graphics.

This is where the problem comes in. As I'm installing on my laptop, all the memory had been partitioned to main partition. I had no extra memory left over for Fedora. I tried shrinking the memory on the linux boot but it kept throwing an error. After discussing with a few people in the lab, I found out I had to shrink the windows partition once logged onto windows. So I rebooted into Windows and researched how to do it. While doing so my system tried running chkdsk at startup but I disregarded it and skipped it. Researching lead me to an administration tool that allows you to shrink your partition. I tried doing so but it threw an error telling me it couldn't do it and maybe the partition was corrupt. I ran chkdsk as someone suggest and to my dismay, nothing was wrong. So I restarted and let chkdsk run again at boot but nothing was wrong there either.

So after rebooting I tried shrinking the drive again just for kicks and it worked. Success. So now the drive has been shrunk and I have 200 gigs for my Fedora partition. I booted from the DVD again and got back to the correct screen. I click create partition with left over space and ... error. "There is no space to create this partition". I check under custom partition and the space shows up. Why. Why isn't it working.

I go back into windows and search on the web for an hour. Finally I come up with someone having a similar problem. HP computers come with 4 partitions already on them to hold some HP software that comes with the laptop. A hard drive can only hold 4 partitions so you have to delete one. Ok, this makes sense now. I remove one of the pointless partitions using the drive manager and reboot again on the Fedora DVD.

After getting back to the right place, I try again, it works. Finally, I have been able to run the Fedora install. But of course I forgot to do custom and select swap so now every time I start my computer I have to press a button before Fedora boots and select the "Other" Partition. I'll fix that later but for now, I am very happy.

Sunday, September 25, 2011

Improving Emscripten

I have decided to help out on emscripten by using my new set of eyes to improve the aesthetics in the code. A lot of the other current people on the project have been on it for too long and have a hard time telling what is more or less readable to new people on the project. I think this will be a good first milestone for the course and an excellent way to get more involved and become knowledgeable on emscripten.

Git and Github

All this week I have been playing around with git and github and they are surprisingly simplistic. After making my own forks on my github and cloning the repository to a linux machine to work on, I have been deciding the best route to help improve emscripten. Most of the requested bug fixes are currently over my head but the more time I spend looking through how everything is organized, the more sense it seems to make.

I think I might ask one of the leaders of this project on IRC where a good place to start helping would be.

Here's to hacking away on a Sunday night.

Thursday, September 15, 2011

Diving Further Into Paladin

Not long after my introduction to the Paladin IRC channel I have talked with one of the two coders working on part of the physics engine. I have been directed to https://github.com/kripken/ammo.js to look at and play around with Ammo.js. Ammo.js is a c++ to .js conversion procedure that is currently being updated to be tested/become more efficient.

After a few days of diving into it, I'm going to recontact azakai to see what I should start working on.

So far, so good.

Joining the Paladin Team

The project I've decided to work on is Paladin. I joined the IRC and realized that one of my friends are part of the project so I directed a message at him. The user JBuck proceeded to answer my question since my friend wasn't there at the time. JBuck then explained a bit about the physics engine details to the project and who I should talk to about it.

Definitely was a great help having someone I didn't know help me get involved with the right people and right parts to the project I wanted to get involved in. JBuck then decided it would be a good idea to create a blog post about Paladin and how to get started.

My first experience with the Paladin team showed me they're friendly and helpful to new comers.

Thursday, September 8, 2011

Skype's Terms of Use

While reading Skype's terms of use, I came across an interesting line.

Changes to the Additional Terms will be posted on the applicable Skype Website. The changes will be effective when published. Please review the Terms on a regular basis. You understand and agree that your express acceptance of the Terms or your use of the Software, Products and/or Skype Websites after the date of publication shall constitute your agreement to the updated Terms.

By agreeing to Skype's terms you are agreeing to all their future terms as well. They are able to make any changes to your agreement and you are automatically under that new license. They expect you to read the license frequently to see the new license changes. This is slightly ridiculous since who has time to read a license constantly, day after day.

Starting ODS600 Class

I'm going to highjack my old c++ blog and use it to start hosting posts about my open source class at Seneca. I'll begin to post something weekly about my experiences.